
MAKER’SSHIRT.
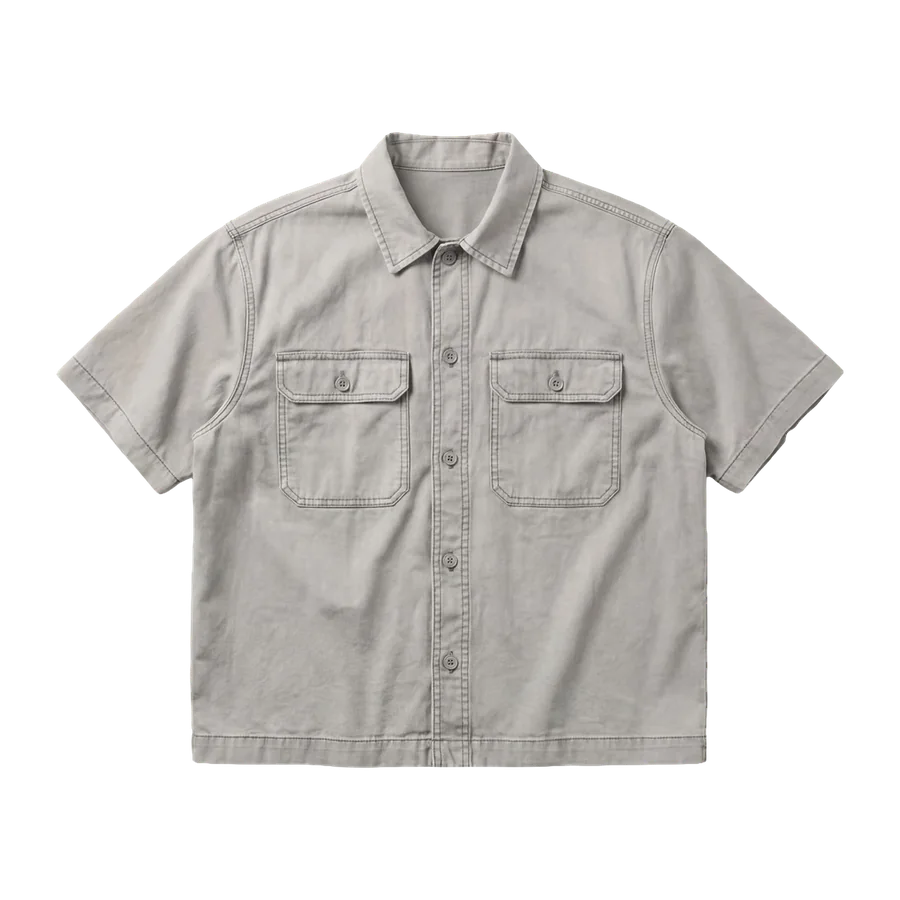
A shirt for wherever
the day takes you.
Your first true step into wearable garment construction — short sleeves, functional front pockets, and a crisp collar. More involved than accessories, approachable enough to push you forward.
No build video for this pattern — you get the pattern and booklet. See the closest video ↓
The things you’ll
make your own.
A closer look at the techniques and details inside this pattern.
STUDY / MAKE / REPEAT
Good things take
a little making.
Small steps.
Real progress.
Select a panel to explore. Follow the tutorial for the full construction sequence.
Shirt construction logic
Explore shirt construction logic as part of the The Makers Shirt build. Follow the pattern and its construction resources for the exact sequence and method.
Your next build.
Inside the folder.
See the file formats and reference material before you choose your pattern. The project starts with knowing what you’re opening.
Print at actual size. Check the test square before cutting fabric.
ROUGHCUT / The Makers ShirtYour pattern files.OPEN YOUR DOWNLOAD FOLDER +
Full-size sheets for large-format printing.
Tiled pages for an A4 printer.
Tiled pages for US Letter paper.
Panel labels, notches, cutting layout and materials information.
Every size is on its own layer. In Adobe Acrobat Reader, switch off every size except yours, then print only your size.
¼″ already included — cut on the line
Folder illustration shows file categories, not a page-for-page preview.
No build video
for this one.
Read this before you buy.
You're buying the pattern and its booklet, knowing there's no step-by-step film of this shirt. The closest is the Kaze part of my wrap shirt video (from 46:46): facings, sleeves, collar and stand. The yoke and flapped pockets are written in the booklet.

Choose the cloth.
Make it yours.
Fabric changes the character. Check the pattern’s material guidance before buying.
A starting point for fabric
The calculator works out exactly how much to buy for every size and fabric width, measured piece by piece from the full-size A0 pattern.
Measure something
you already love.
Lay a similar garment flat. Compare like-for-like measurements with the pattern chart, keeping the intended fit in mind.
| Garment area | What to compare |
|---|---|
| Chest / waist | Use the same flat or circumference method as the chart |
| Length | Measure between the same start and end points |
| Movement | Allow for layering and the intended silhouette |
The Makers Shirt — published measurement chart

Open the image at full size to read the original values and units.
Real cloth.
Real possibilities.


Before you buy fabric
How much fabric do you need?
Pick the garment, your size and the width of the cloth you're buying.
All calculations are made from the full-size A0 sheet: every panel measured and laid next to each other with the grain running straight, for every size. Then we add 5% (a real cutting table never packs as tight as a computer) and 0.5 m spare, which covers a recut, a flaw in the cloth or a piece that slips off grain, and saves you hunting for a dye lot that's gone. The width you enter is taken as the full roll; 2 cm is left for the selvedge.
Your next build
starts here.
Choose a digital download or have the pattern printed and shipped. Fabric and hardware are not included.
A few things
to know.
Am I buying a finished garment?
No. This is a sewing pattern. You choose your own fabric and hardware and make the garment.
What do I receive?
Open the download folder above for the listed formats and resources. Digital is a file download; printed is a physical paper pattern. Check the selected format before purchase.
How do I choose a size?
Use the published measurement chart and compare a similar garment you already own. The comparison tool shows one measurement difference, not a guaranteed fit or automatic size recommendation.
Can I start with just one pattern?
Yes. Each pattern has its own page. Explore the collection links if you would like to build related garments over time.
Where can I share my finished build?
Share with #ROUGHCUTMYOG or visit Community Builds on the Rough Cut website.